How to Manage Tables, Dining Zones, and Floor Scheme
Adding dining tables, organizing floor sections, and positioning furniture in the interactive Scheme layout editor.
Steps
Navigate to Tables or Scheme
Open Dashboard → Tables (`/dashboard/tables`) or Scheme (`/dashboard/scheme`).
Tables provides a structured list view of all zones and tables; Scheme provides a visual 2D floor designer.
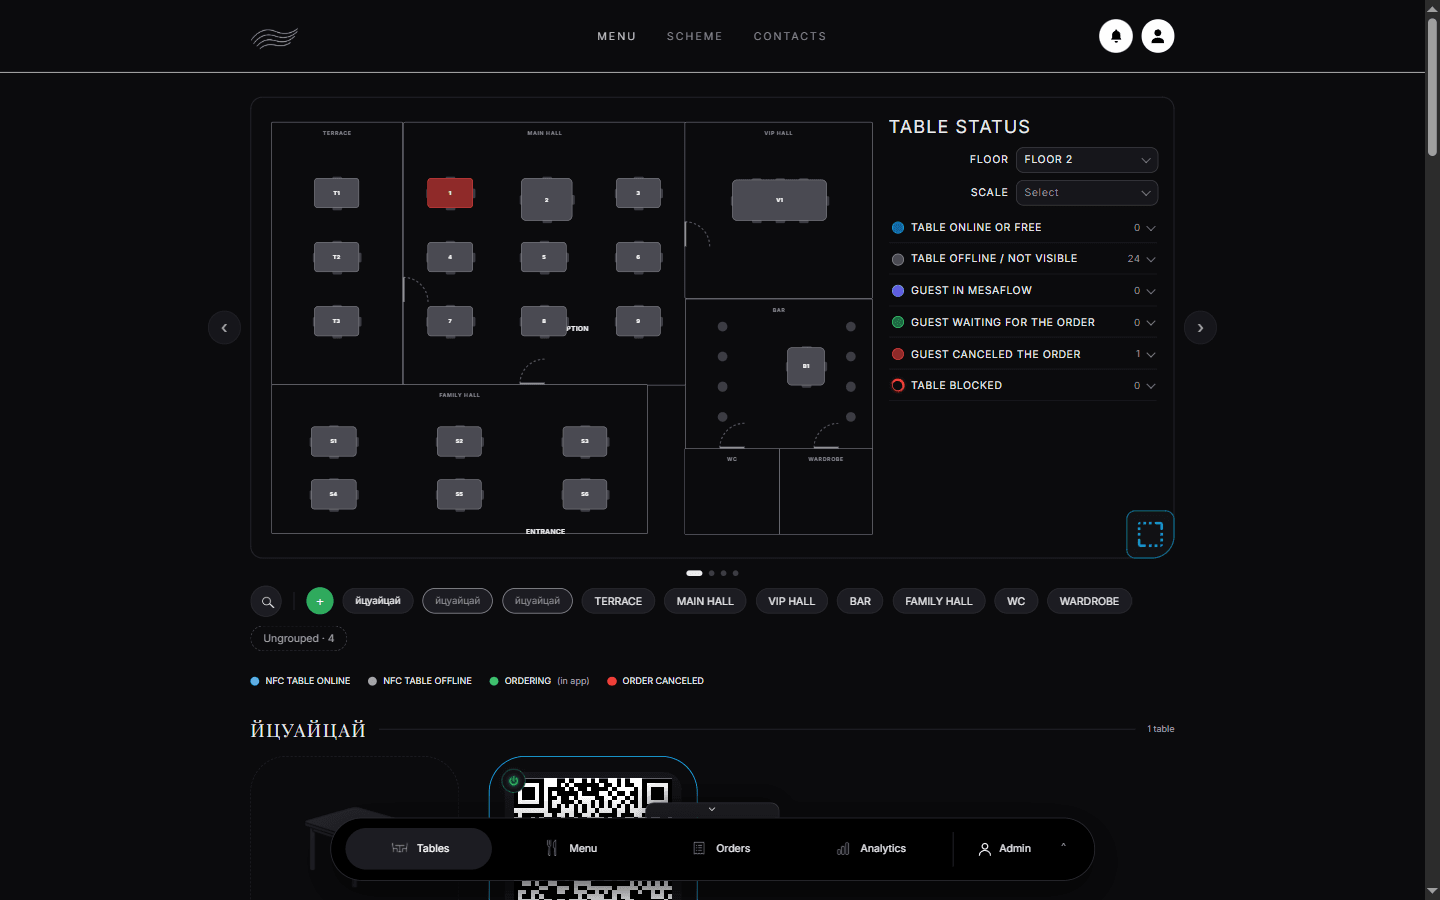
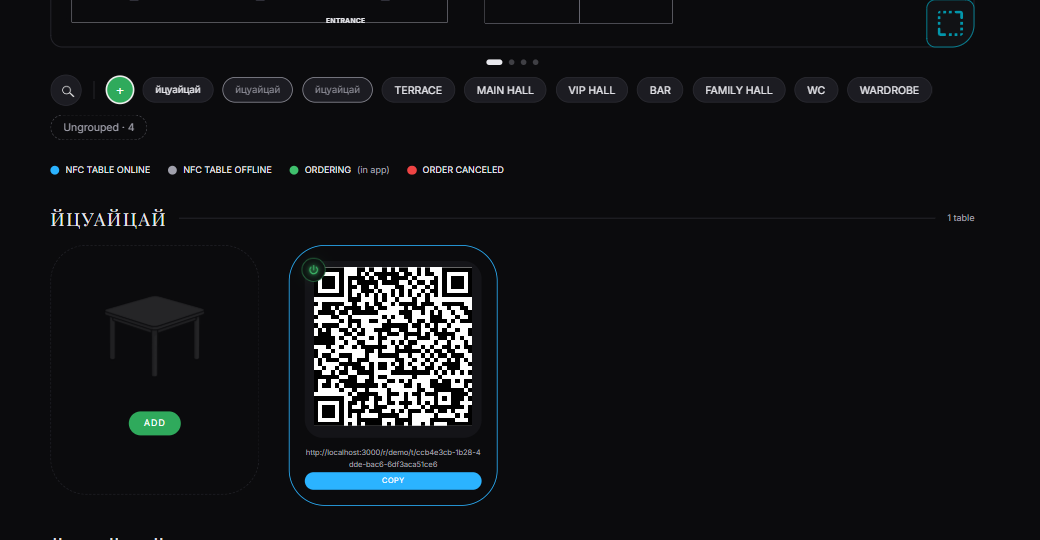
Dashboard → Tables. The floor plan is on top and one chip per table group sits below it. Create a table group
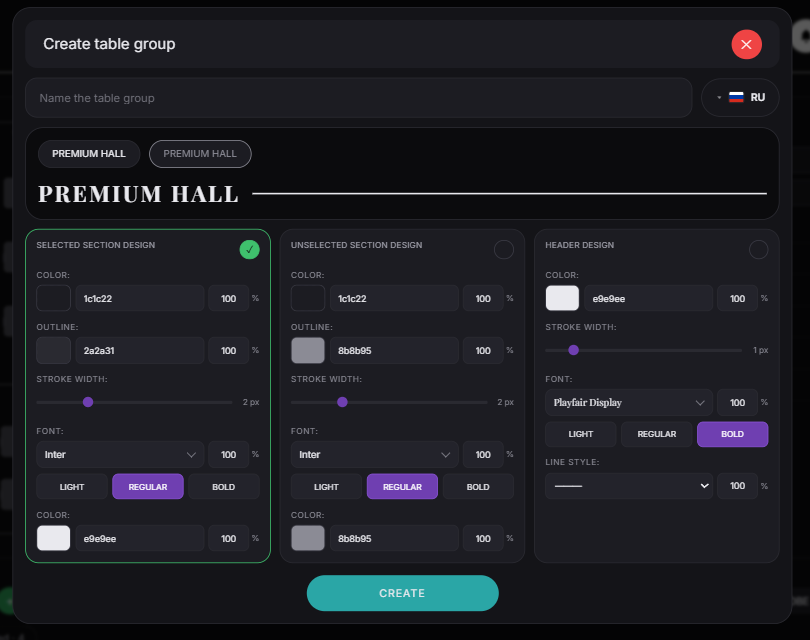
On the Tables screen, press the green + next to the search icon, name the group and press Create.
A group is an area of the restaurant, such as "Main Dining", "Garden Terrace" or "Bar Area". Every table belongs to a group, and the group chips let you jump between areas.
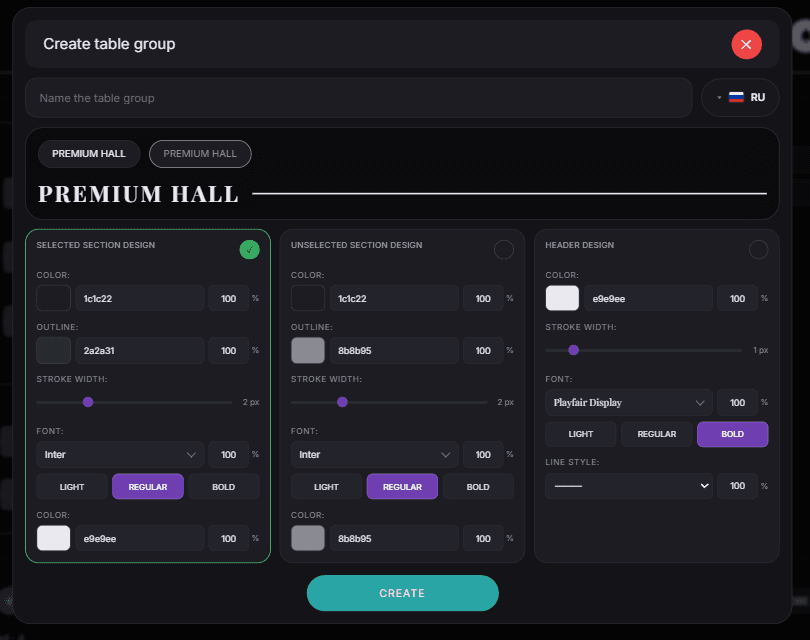
The green + opens Create table group. Name the group, choose how its chip looks, then press Create. Arrange tables in the Scheme editor
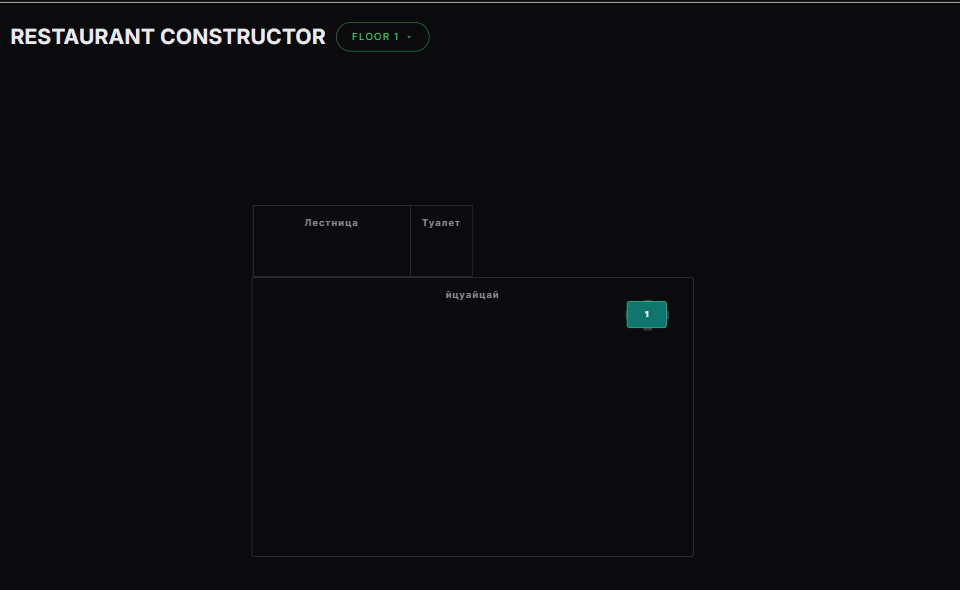
Switch to the Scheme editor tab to position, resize, and orient tables on the grid.
Drag tables to reflect their real physical arrangement. Waiters will see this layout when unfolding the floor plan on `/waiter`.
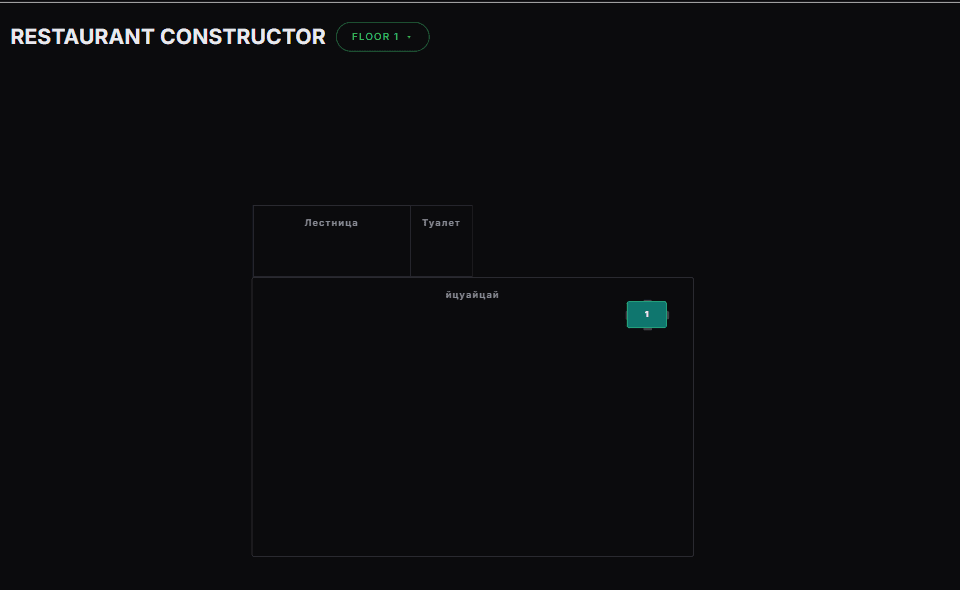
Dashboard → Scheme. Halls and tables are positioned on the floor. Join tables for group seating
To merge two or more tables for a large party, select the tables and choose "Join Tables".
Joined tables route orders and bills under the primary table designation until separated.
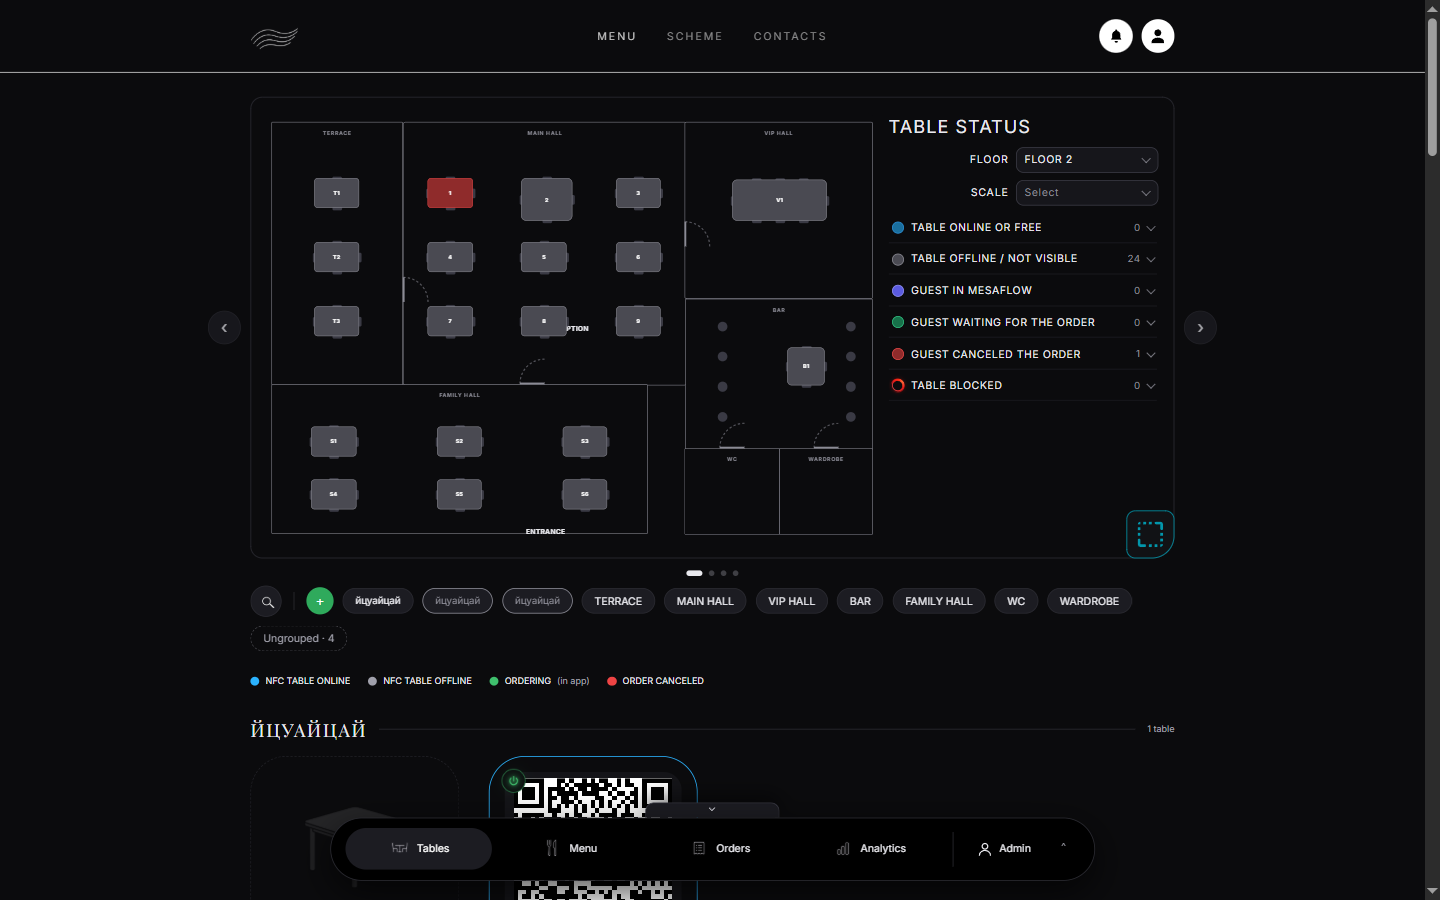
What you should see
The restaurant’s floor map accurately reflects real-world table locations.
Good to know
- Remember to link each physical table to its NFC card in Card Management (`/dashboard/cards`).